Monday, 15 December 2014


Thursday, 11 December 2014
Adding effects into the music video:
Green screen:
One of the main effects i used in the making of the music video was the use of green screen; which i used during the lip syncing and performing shots. While editing i used the effects tool in Adobe Premiere to crop out the green background, until the back ground was completely black. I then add a track under neath all the green screen tracks. Each of the three addition tracks were made to be backgrounds of three different colours: Red, blue and yellow. I then synced the layers together.

Text:
During parts of the video there is bit of text saying Survival (the title of the song) can be seen going up and down along the screen. To do this effect i first created a new layer and added a text caption; after going to Dafont.com to find an appropriate font for this caption. I then animated the text in order to move down or up. I used Premiere's motion tool to do this task. I moved the text slightly, and then selected this position as part of the sequence. I then repeat this process until the text was out of the frame. This can be seen three times thought out the whole video.
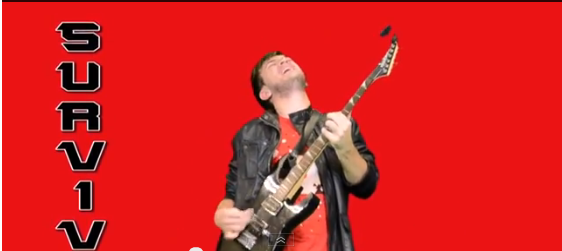
One of the main effects i used in the making of the music video was the use of green screen; which i used during the lip syncing and performing shots. While editing i used the effects tool in Adobe Premiere to crop out the green background, until the back ground was completely black. I then add a track under neath all the green screen tracks. Each of the three addition tracks were made to be backgrounds of three different colours: Red, blue and yellow. I then synced the layers together.
Text:
During parts of the video there is bit of text saying Survival (the title of the song) can be seen going up and down along the screen. To do this effect i first created a new layer and added a text caption; after going to Dafont.com to find an appropriate font for this caption. I then animated the text in order to move down or up. I used Premiere's motion tool to do this task. I moved the text slightly, and then selected this position as part of the sequence. I then repeat this process until the text was out of the frame. This can be seen three times thought out the whole video.
Feedback from my client (Music video draft one):
After publishing and exporting my first draft of my music video, i had received feedback after she'd watched the first draft of the video. She told my that during the second half of the video, there was a lack of events happening on screen. She mentioned how it kept cutting back and forth between the guitar playing and the race; and that there would be more footage needed in order to make the video more interesting.
So i looked back through the footage i did have, and looked for ways to feature them during this section of the video. I found a load of places that they could be featured and now there is more going on during the second half of the video.
Using our planning documents (Music video) :
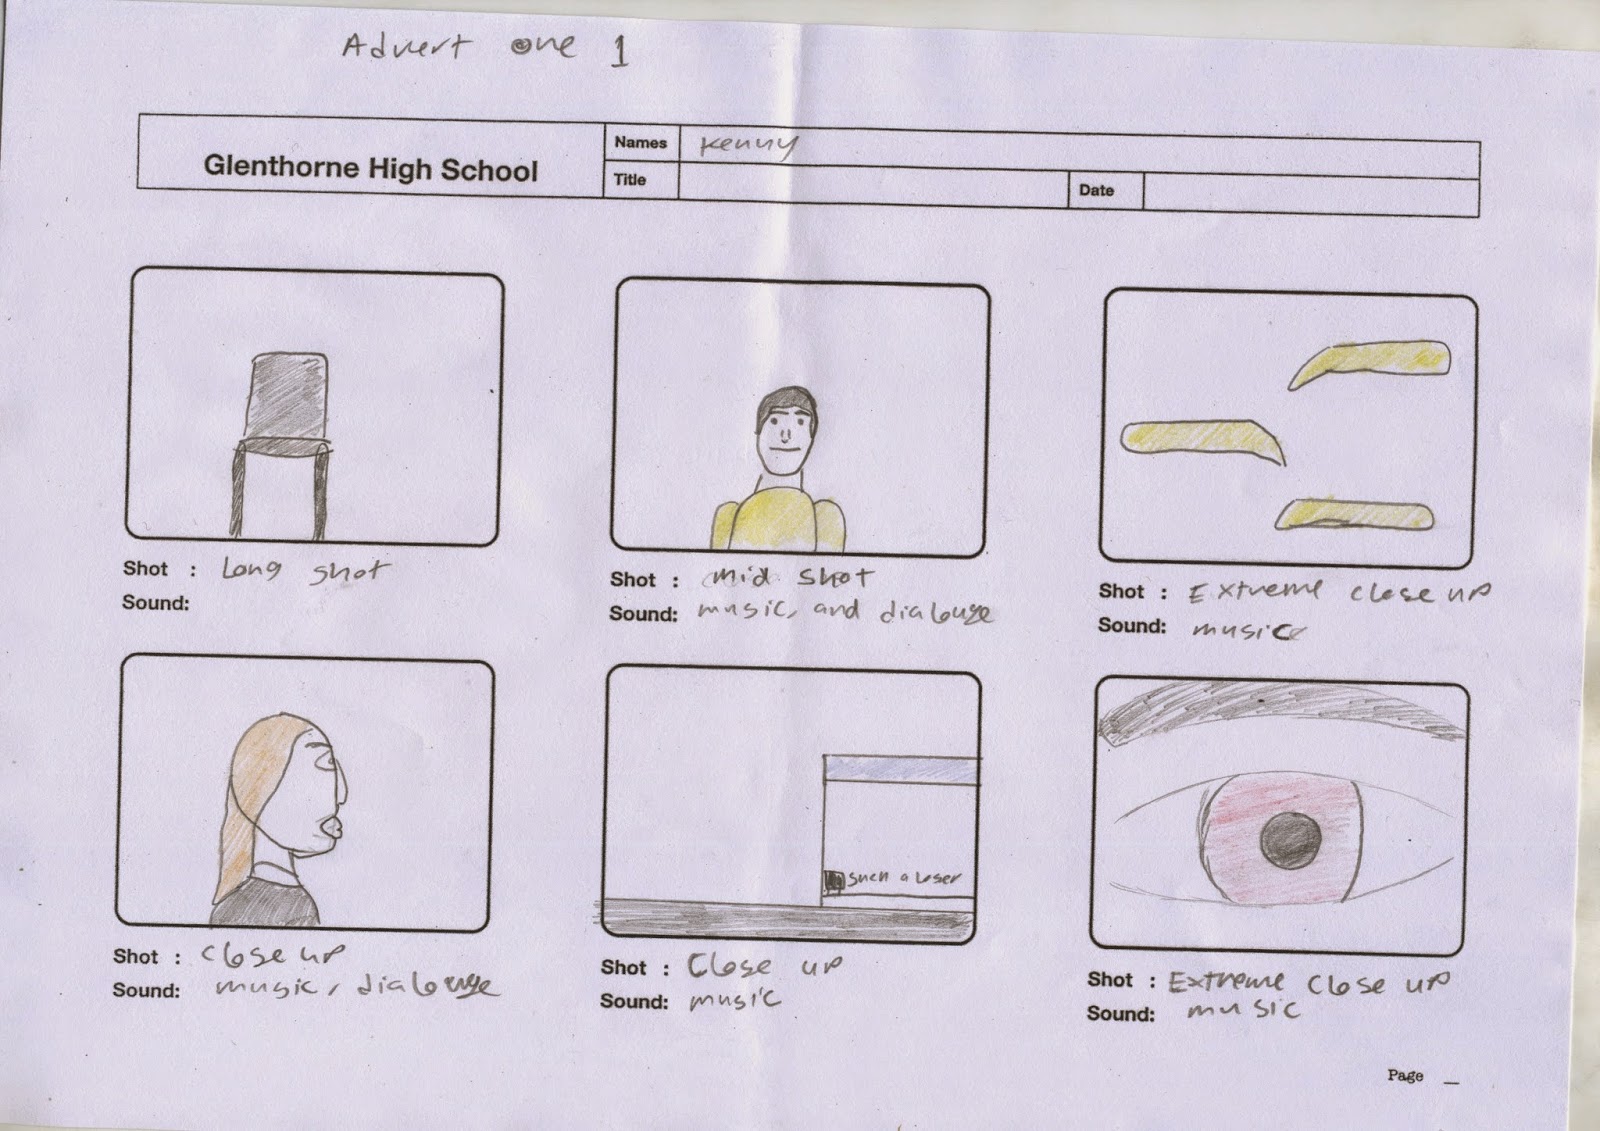
Storyboards:
During filming i used the storyboards to decide what the shots should look like. While filming we went to the location with the props that would be needed. We then looked at the storyboard shoot for this scene; we then placed a prop, the camera or an actor into a position that would match what the frame looked like to the best of capabilities.
Risk Assessment:
Whilst filming on locations, i and the people i was filming with used the risk assessment to help us keep safe on our location shoot. Before starting to film i wrote about the risk that could be faced out o location: Rain, knocking over equipment etc. I went through these safety tips with my partner. We then looked around to see if the amount of people would ruin the shoots or take equipment (neither of which happened) we looked at the weather and judged whether i could cause problems (aside from the wet ground, it didn't). Given that we were doing a lot of shoot of us running, we made sure our cameraman moved the camera further enough to see us, but also so it doesn't get hit by the camera.
Shooting schedule:
In order to help with the filming, i used the shooting schedule to help arrange when and where to shoot at, and who to bring to the location shoot.
Tuesday, 2 December 2014
Subscribe to:
Comments (Atom)